
WooCommerce is one of the most popular e-commerce platforms available today, with over 4 million active installations. It’s a free plugin for WordPress that lets you turn your website into an online store. If you’re new to WooCommerce and want to know how to add new products, this tutorial is for you.
Step 1: Install WooCommerce
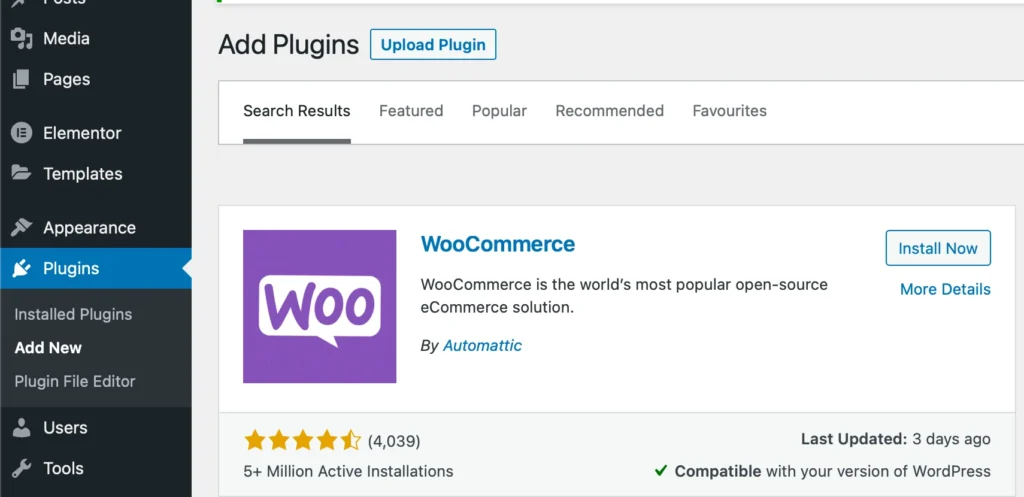
Before you can add new products, you need to install WooCommerce on your WordPress website. If you haven’t done this yet, go to the WordPress dashboard, click on “Plugins” and then “Add New”. Search for “WooCommerce” and click on “Install Now”. Once installed, click on “Activate” to enable the plugin.
Step 2: Navigate to the Products page
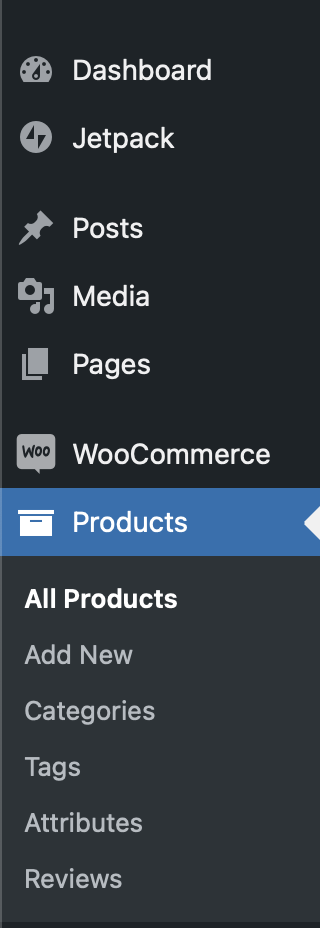
Once WooCommerce is activated, you’ll see a new menu item called “Products” in the WordPress dashboard. Click on it to go to the “Products” page. This is where you can add new products, edit existing products, and manage your product inventory.
Step 3: Add a new product
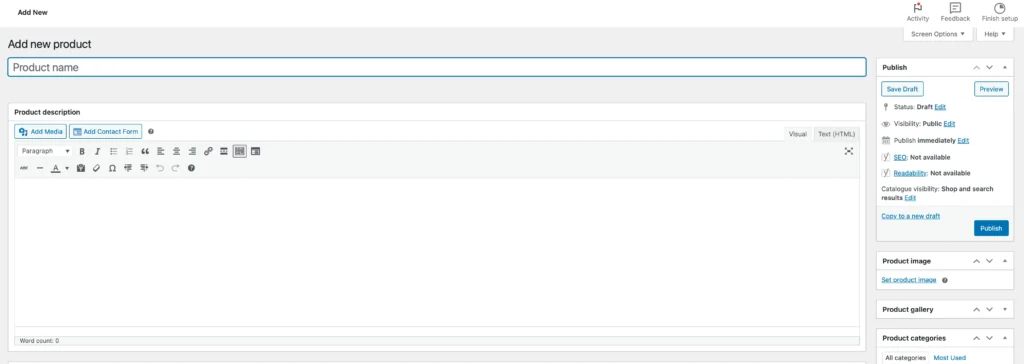
To add a new product, click on the “Add New” button on the top of the “Products” page. This will take you to the product editor screen.
Step 4: Enter product details
The product editor screen has several fields where you can enter the details of your product. Here’s a quick rundown of the most important fields:
- Product name: Enter the name of your product here. This is the name that will appear on your website.
- Product description: This is where you can enter a detailed description of your product. This should include all the information that your customers need to know about the product, including its features, benefits, and any technical specifications.
- Product category: You can assign your product to one or more categories to make it easier for your customers to find.
- Product tags: Tags are like keywords that describe your product. You can add as many tags as you like, separated by commas.
- Product image: Add a high-quality image of your product here. This is the image that will be displayed on your website.
- Product gallery: You can add multiple images of your product in the gallery.
- Product price: Enter the price of your product here. You can also set a sale price if you want to offer a discount.
- Product inventory: This is where you can manage the stock of your product. You can set the stock status to “In stock” or “Out of stock”, and also set the quantity of the product you have in stock.
Step 5: Publish your product
Once you’ve entered all the details of your product, click on the “Publish” button to make your product live on your website.
Congratulations! You’ve just added a new product to your WooCommerce store. Repeat these steps to add more products as needed.
Adding new products to WooCommerce is a simple process that can be done in just a few minutes. Just follow the steps outlined above, and you’ll be on your way to creating a successful online store. If you are having trouble doing this yourself, you can always send Gavamedia an email or give us a call and we’ll be happy to assist you with your WooCommerce needs.
Discover more from GAVAMEDIA
Subscribe to get the latest posts sent to your email.